In this guide I want to show you how to set up GA4 for your Shopify app with the most important features like Conversion events and BigQuery connection. Also we are covering the setup of the Google Analytics Measurement API which has been rolled out in Sept. 2023 on the Shopify app store (not covered in video).
If you have not migrated to GA4 yet this now is your chance and there is no excuse not to do it because there are some really cool features. I will walk you through setting it up connecting it to your Shopify app listing, setting up the conversion event and I’m going to show you how to set up the connection to BigQuery which is really new in GA4. It allows you to access the G4 raw data which can be a really powerful tool. I highly recommend doing this as soon as you migrate to GA4 because you cannot get back this data at a later point.
How do you switch from Universal Analytics to GA4?
Step 1:
If you have an existing Universal Analytics property, I recommend just clicking Go to Setup Assistant which will migrate all the settings that you have to your new GA4 property. If you don’t have that, obviously you need to create a new one from scratch, which is however quite identical for the further settings.

Step 2:
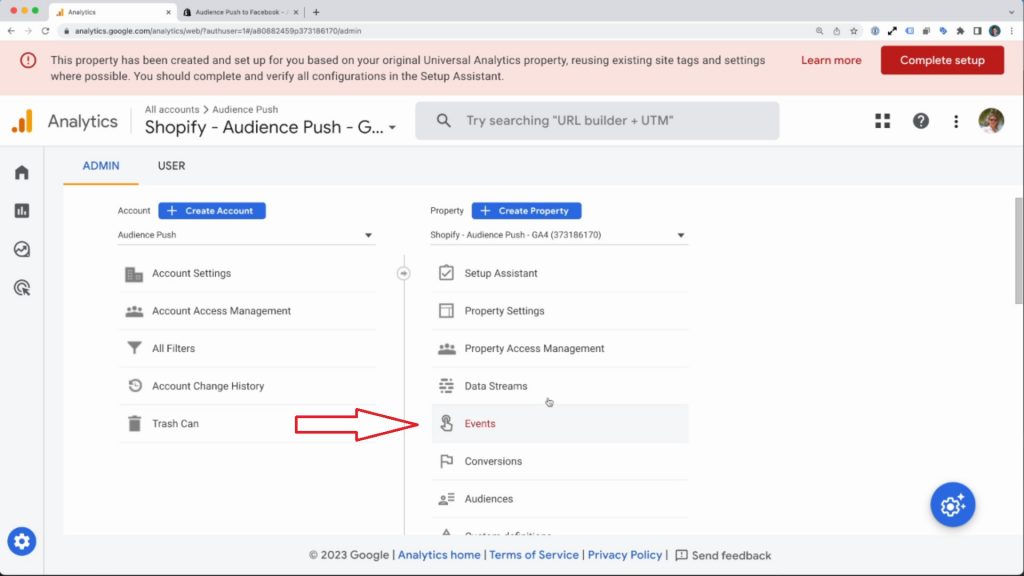
So clicking the button brings us to this screen where it says that the migration has been successful and we can now go to our new GA4 property. In our new GA4 property, we want to go to data streams.

Here we see a data stream that already was created by our migration so we can select this one and otherwise we just create a new data stream in the data stream settings.

Step 3:
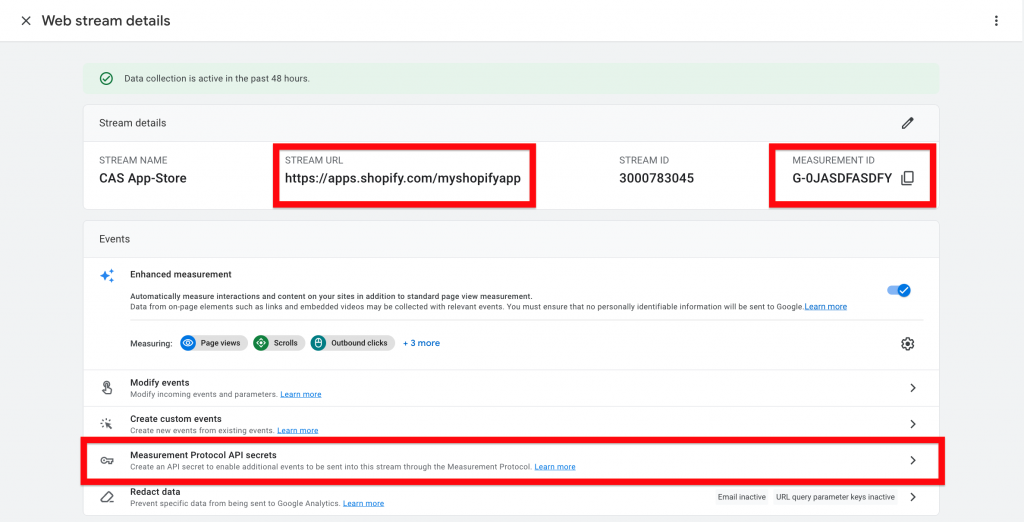
Double check that the stream URL actually corresponds to the listing URL and copy the measurement ID.
Since September 2023, Shopify also supports the use of the Measurement Protocol API, which you should set up as well by creating a new API secret below.
Step 4:
With this information, we are going to head over to our Shopify App listing and paste it in the field Tracking ID and the API secret of the Measurement Protocol. After hitting Save, let’s test if our new setup is working.

With this, we are going back to Google Analytics and go to Reports -> Realtime.

Here, scroll down to the section called Event Count by event name. Let’s watch the section as we initiate an app install from the listing page.

Step 5:
So let’s head back over to our Shopify App listing and click Add.

If everything is set up correctly, we will shortly see a corresponding event in Google Analytics. And after about 30 seconds delay, we see an event with the name Add App button.

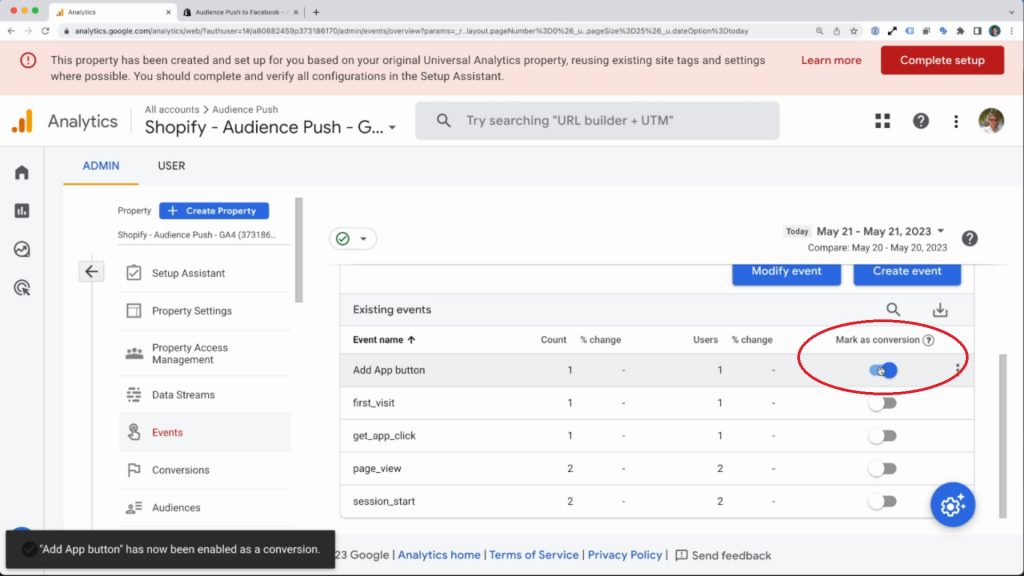
Step 6:
Now, as an optional step, we can mark the Add App button event as a conversion event. For this, let’s go back to settings and events.
In case you don’t see the Add App button, make sure you set today as the respective time frame.
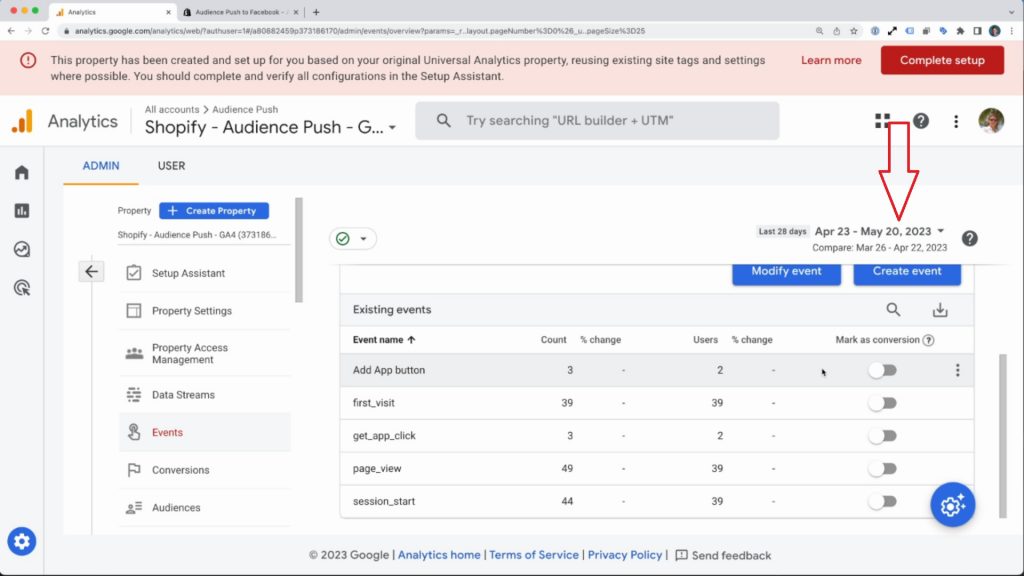
And finally, just enable Mark as Conversion for the Add App button event.
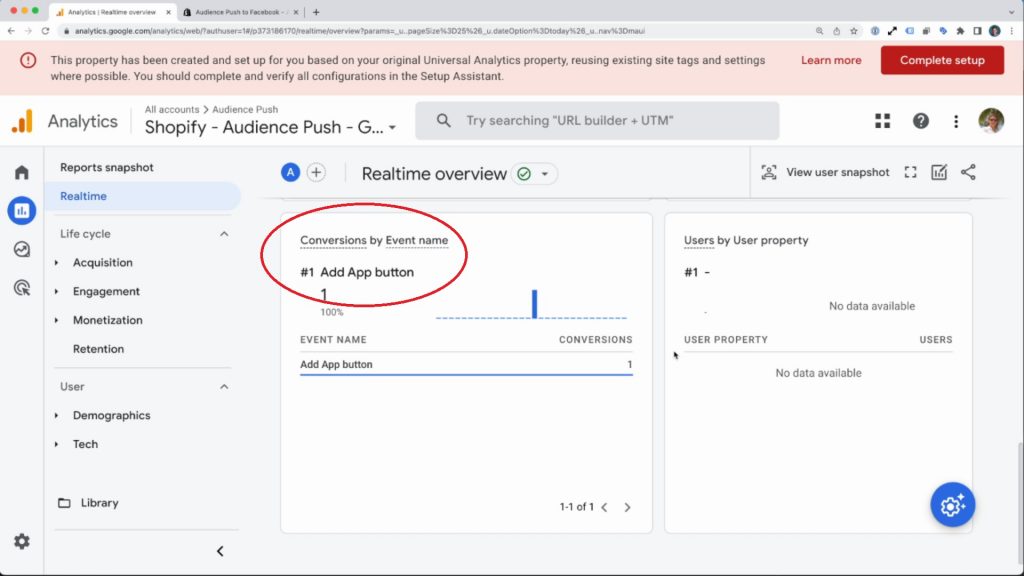
Now, the real time report. We can head to the section named Conversions by Event and we should see our Add App button counted as a conversion.
Integrate BigQuery with GA4
One of the great things with GA4 is that we can connect it to BigQuery for free and get access to the entire raw data.
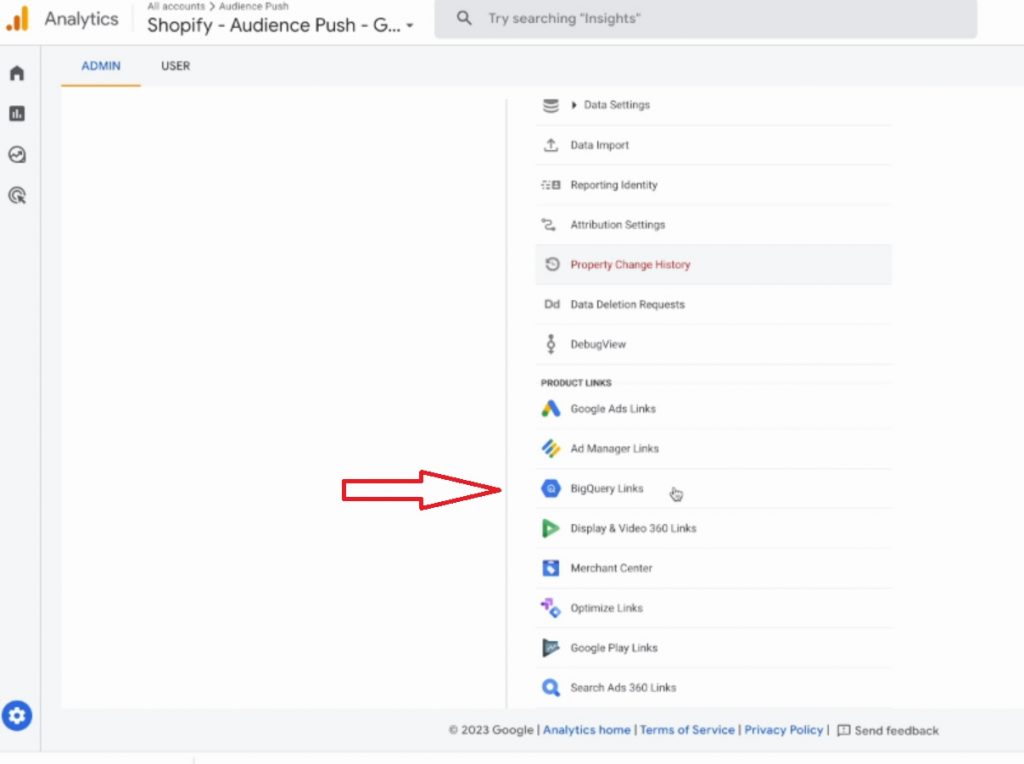
Therefore, I would highly recommend setting this up as soon as possible when migrating to GA4 because you cannot retroactively export the data from GA4 to BigQuery.
Step 1:
For this, you’re going to need a Google Cloud platform account which you can create for free.
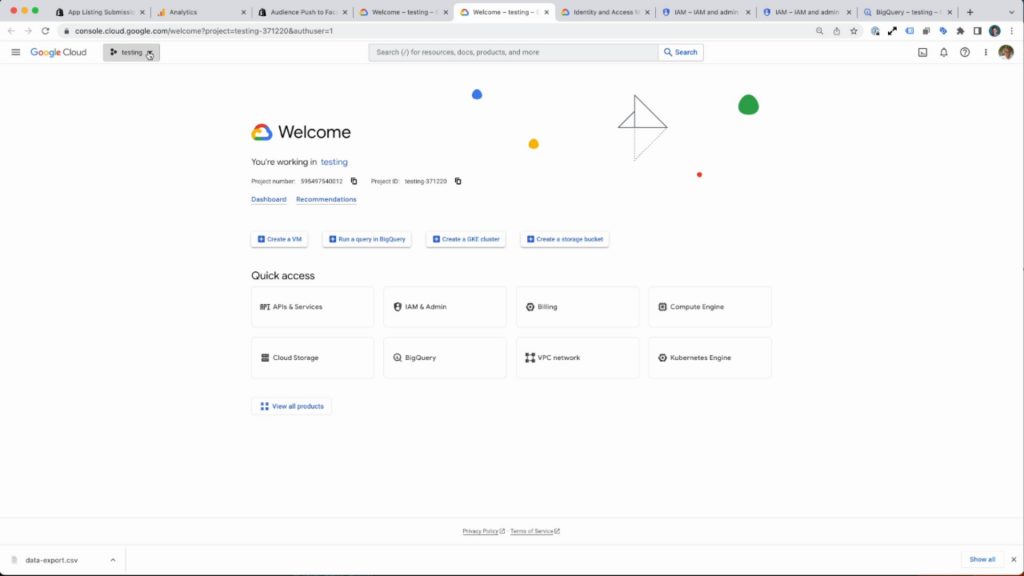
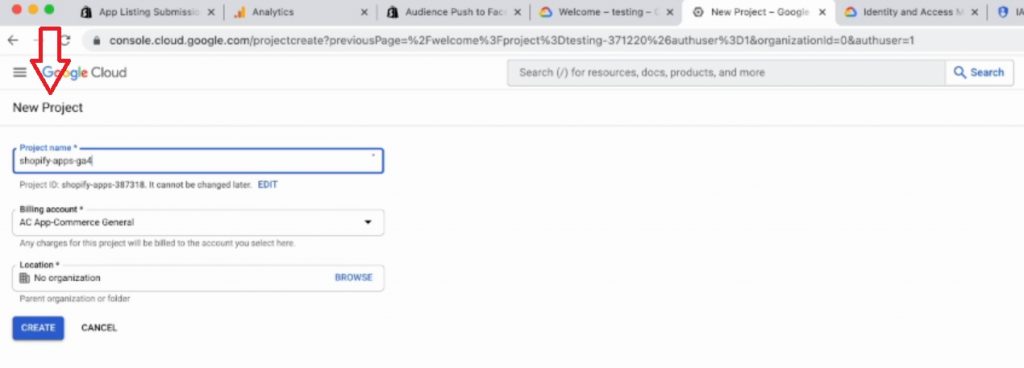
Step 2:
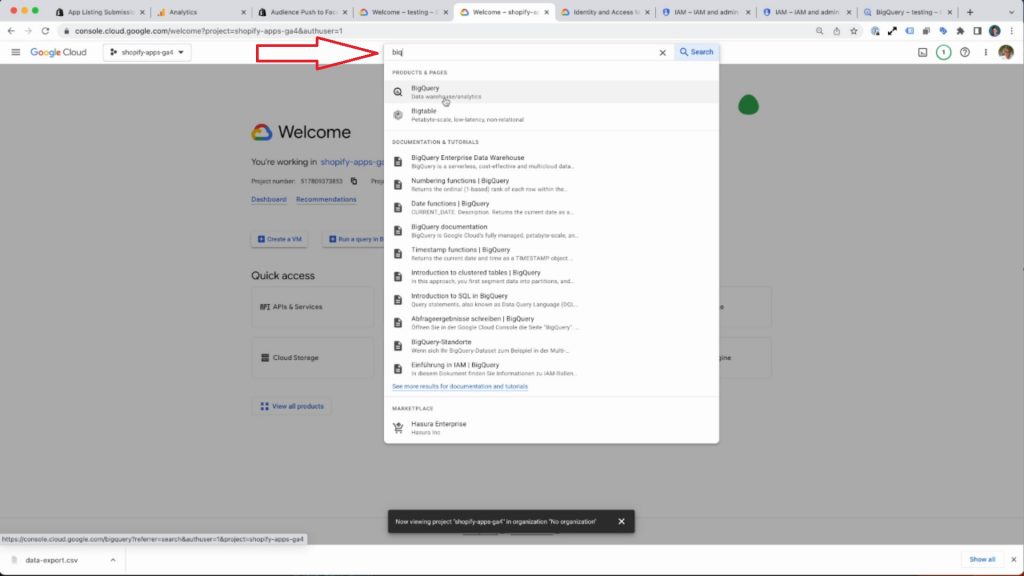
I would also recommend to create a new project to keep all your BigQuery data sets in to see if BigQuery is enabled properly in the new account, just type BigQuery into the search box and this will bring you directly to BigQuery.
In this case, BigQuery says Sandbox account, which is because we haven’t enabled billing for it.
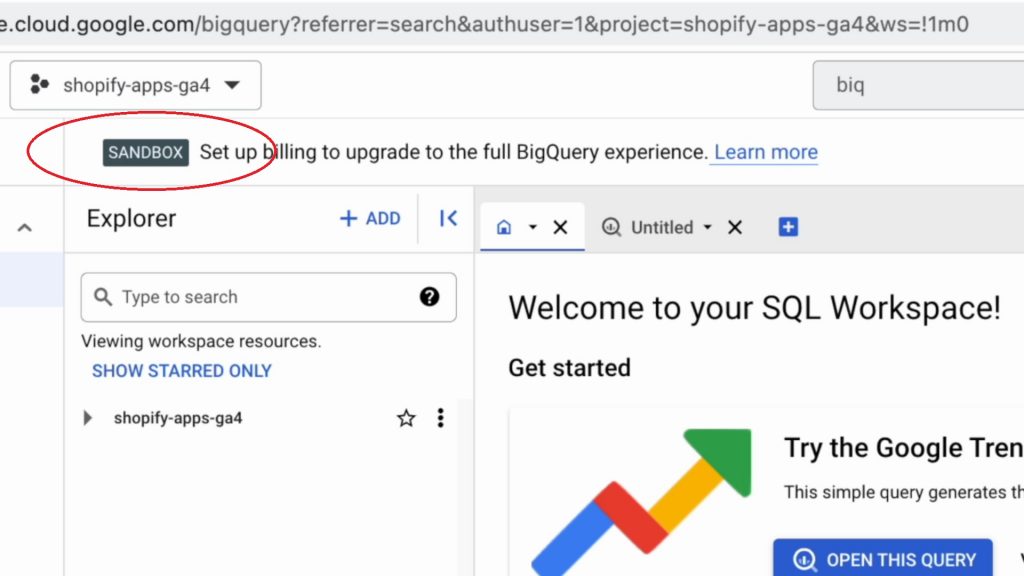
Step 3:
So you need to add a billing account with a valid credit card and you will just get rid of this Sandbox label. You will not be charged, and It will be usable with GA4.
So after fixing the billing, we can now head back over to GA4 and finally link BigQuery to the project that we have just created.
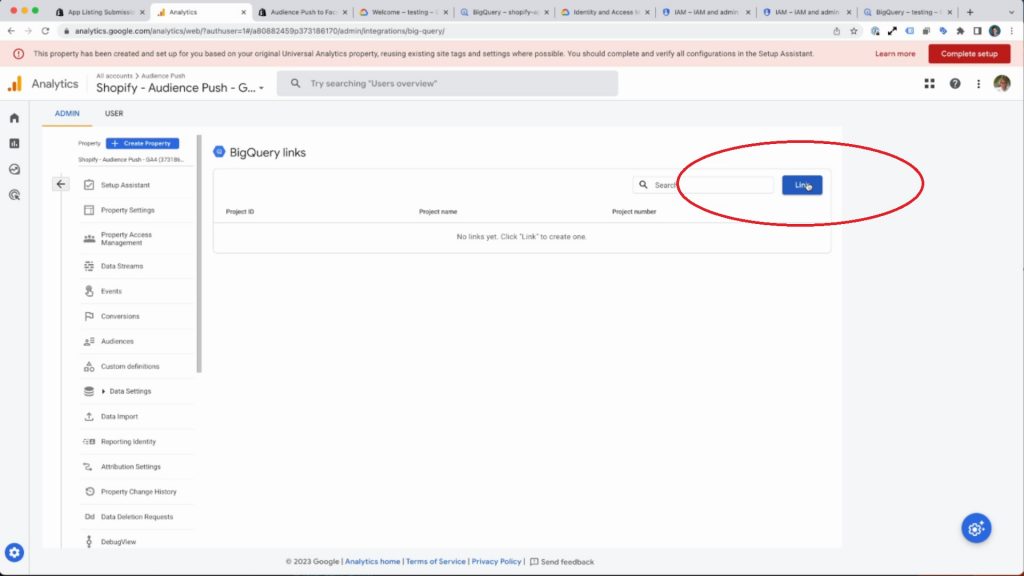
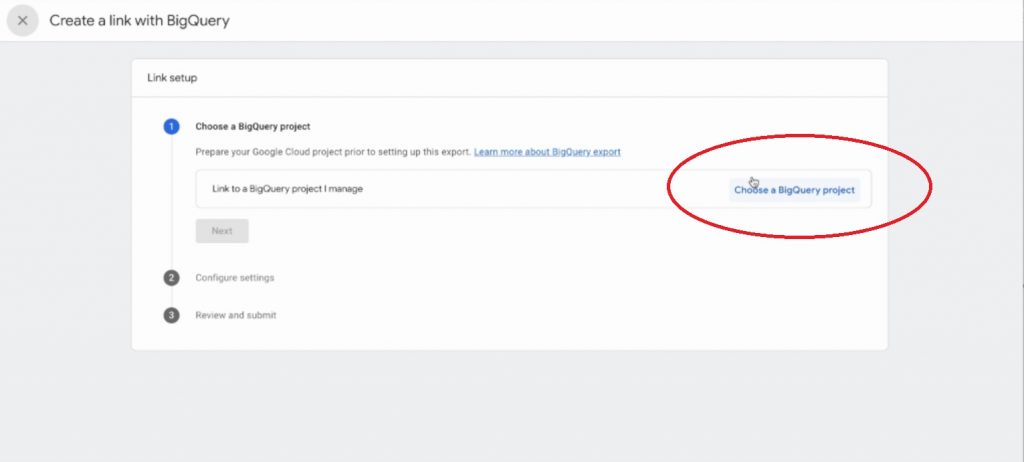
Step 4:
In the second step, we are going to select Daily and streaming as an optional choice to get more recent data.
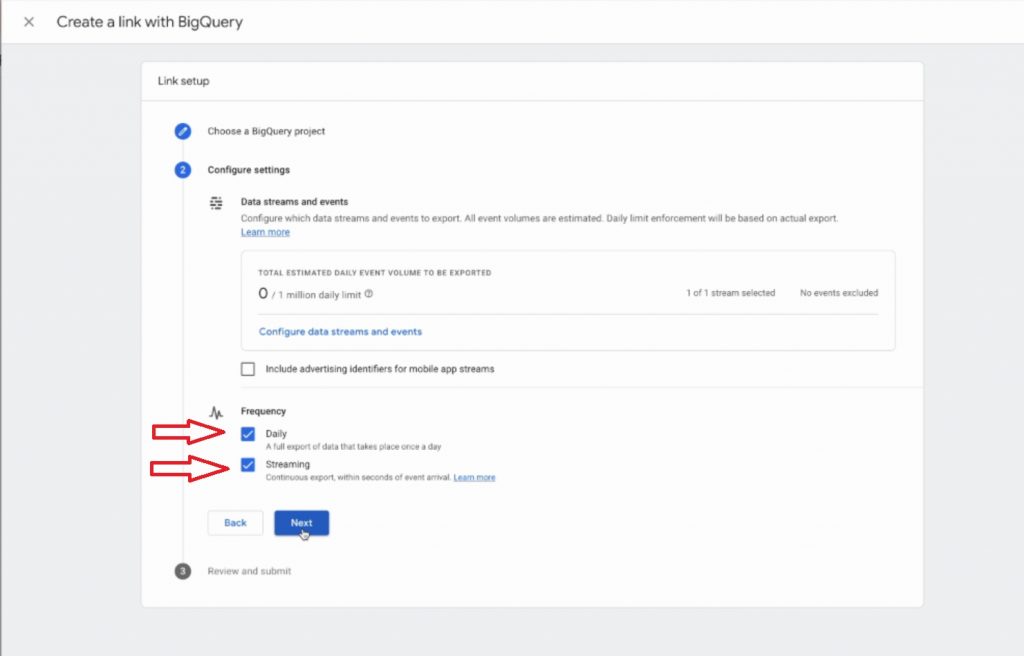
As we can see, the link was created successful and we are sure to now have all our raw data for later use or for use with Fusionmetrics that can readily attribute this data to actual revenue data.